Using the Oscilloscope
Using the oscilloscope for several different types of measurements, such as time, phase, frequency, and amplitude of observed waveforms is common. Earlier in this section, you learned that using the oscilloscope is most often to study the shapes of waveforms when the performance of equipment is being checked. The patterns on the scope are compared with the signals that should appear at test points (according to the technical manual for the equipment under test). You can then determine if the equipment is operating according to peak performance standards.
TURNING ON THE SCOPE
Before using the oscilloscope, make sure it is plugged into the proper power source. This may seem obvious, but many technicians have turned all knobs on the front panel out of adjustment before they noticed that the power cord was not plugged in. On some scopes, the POWER switch is part of the INTEN (intensity) control. Turn or pull the knob until you hear a click or a panel light comes on (the figure below). Let the scope warm up for a few minutes so that voltages in all of the circuits become stabilized.

Components to energize scope.
OBTAINING A PATTERN ON THE SCREEN
When adjusting a pattern onto the screen, adjust the INTEN (intensity) and FOCUS controls for a bright, sharp line. If other control settings are such that a dot instead of a line appears, turn down the intensity to prevent burning a hole in the screen coating. Because of the different speeds at which the beam travels across the screen, brightness and sharpness will vary at various frequency settings. For this reason, you may have to adjust the INTEN and FOCUS controls occasionally while taking readings.
NUMBER OF CYCLES ON THE SCREEN Because distortion may exist at the beginning and end of a sweep, it is better to place two or three cycles of the waveform on the screen instead of just one, as shown in the figure below.

Proper signal presentation.
The center cycle of three cycles provides you with an undistorted waveform in its correct phase. The center of a two-cycle presentation will appear inverted, but will be undistorted. To place waveforms on the CRT in this manner, you must understand the relationship between horizontal and vertical frequencies. The relationship between the frequencies of the waveform on the vertical plates and the sawtooth on the horizontal plates determines the number of cycles on the screen, as shown in the figure below.

Vertical versus horizontal relationship.
The horizontal sweep frequency of the scope should always be kept lower than, or equal to, the waveform frequency; it should never be higher. If the sweep frequency were higher, only a portion of the waveform would be presented on the screen.
If, for example, three cycles of the waveform were to be displayed on the screen, the sweep frequency would be set to one-third the frequency of the input signal. If the input frequency were 12,000 hertz, the sweep frequency would be set at 4,000 hertz for a three-cycle scope presentation. For two cycles, the sweep frequency would be set at 6,000 hertz. If a single cycle were desired, the setting would be the same as the input frequency, 12,000 hertz.
DUAL-TRACE OPERATION
The information presented in the previous sections served as a general overview of basic single-trace oscilloscope operation using one channel and operating controls. Now, you will be introduced to DUAL-TRACE operation.
Using the oscilloscope for dual-trace operation allows you to view two independent signal sources as a dual display on a single CRT. This operation allows an accurate means of making amplitude, phase, time displacement, or frequency comparisons and measurements between two signals.
Using the oscilloscope with dual-trace should not be confused
with a dual-beam oscilloscope. Dual-beam oscilloscopes produce two
separate electron beams on a single scope, which can be individually or
jointly controlled. Dual-trace refers to a single beam in a CRT that is
shared by two channels.


Download the NEETS for your own library.
If you would like to download a module or the entire set, we just require a small fee to ensure your manuals are virus free from our secure server. Just click on the highlighted NEETS link.
Become a loyal member to our site. It's free!
Site Search

Tweet


Translate your page
If English is not your first language you can Translate the text on this page to any one of the languages found in the drop down menu. Select your language from the list for an instant translation.
Looking for something unique for your project? Just enter a keyword into the box to search for your item on Amazon
Related Pages

Docircuits interactive circuit simulator
Become an Electronics Technician

Convert most anything with this utility
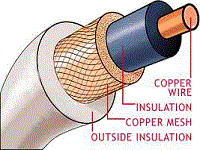
Find your wire and cable here!
Sponsored Sites